Walking through a potential office, retail storefront, or creative studio often focuses on surface appearances. Prospective tenants naturally notice large windows, fresh wall paint, and convenient foot traffic. While visual appeal shapes daily comfort, the underlying technological backbone determines whether daily operations run smoothly or suffer through constant friction. Discovering that a space lacks adequate electrical capacity or broadband access after signing a lease creates expensive disruptions.
Finding an ideal location requires balancing commercial lease terms, square footage, and geographic convenience. When surveying properties, working with experienced agents and using commercial directories like Estate-link.net helps business operators find premises suited to their functional requirements. Once you assemble a list of potential addresses, conducting a methodical technical walkthrough becomes an essential next step.
Approaching a property tour as a technology audit reveals physical constraints that floor plans omit. Bringing a practical eye to power delivery, cabling pathways, environmental conditions, and cellular signal strength helps you gauge whether a building can genuinely support your everyday operational needs.
Mapping Power Delivery and Electrical Outlets
Modern workspaces consume considerable electricity. Workstations require power for displays, docks, laptops, and peripheral chargers, while common spaces host network gear, shared printers, and small appliances. During your walk, count the wall sockets in each work zone rather than assuming general perimeter outlets will suffice. Check whether outlets sit near logical desk positions or whether cables would need to stretch across main walkways.
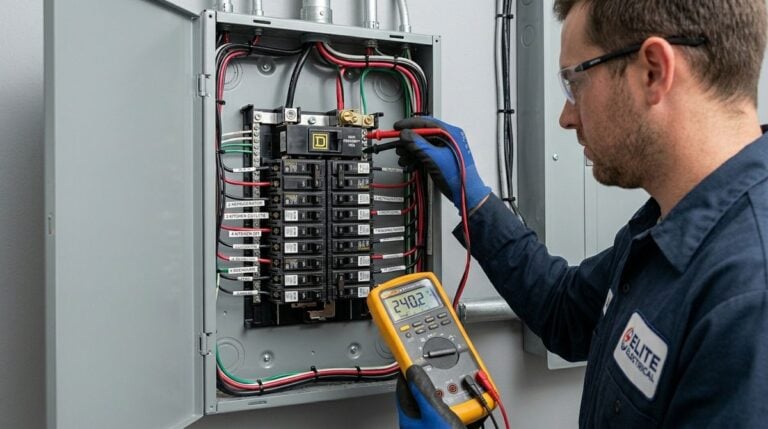
Locate the electrical breaker panel servicing the unit. In multi-tenant buildings, older wiring may share circuit capacity across neighboring suites, leading to frequent breaker trips during peak hours. Examine the panel to see if breakers are clearly labeled and whether blank spaces remain for adding dedicated circuits. Knowing whether the electrical service can support higher electrical demand prevents surprise rewiring expenses later.
Inspect the condition of existing outlet boxes. Loose plates, scorch marks, or damaged receptacles indicate deferred maintenance. Carrying a standard three-prong outlet tester allows you to confirm that sockets have proper grounding, which is critical for protecting sensitive office hardware from common electrical faults.
Assessing Cable Paths and Network Ingress Points
A productive office requires dependable internet connectivity. Start by identifying the demarcation point where external telecom lines enter the structure. Ask the leasing agent where fiber or coaxial cables terminate and which commercial internet providers service the address. If a facility only supports older wiring, bringing modern broadband into the unit may require landlord approval and considerable lead time.
Trace how network cabling travels from the utility entrance to individual offices. Look upward to see whether suspended ceiling tiles exist. Drop ceilings simplify running fresh network lines, whereas solid concrete or exposed timber ceilings require surface conduit, which increases installation labor. Check closets to see if previous tenants left behind structured patch panels, and verify the category rating printed along existing network cables.
Aligning physical network infrastructure with future organizational growth requires thoughtful coordination between technical and operational planning. Working with business advisers like Pedro Vaz Paulo helps leadership teams clarify operational workflows and team scaling requirements before signing commercial commitments. Having that strategic foundation ensures you choose a space that supports your workflow as your operations expand.
Testing Mobile Coverage and Wireless Environments
Never assume urban locations guarantee strong indoor cellular reception. Modern building materials such as treated window glass, thick concrete, and structural steel frequently weaken cellular signals. During your walkthrough, check your smartphone in every corner of the property, including conference rooms, stairwells, and restrooms. Poor indoor signal coverage forces teams to rely entirely on wireless calling, creating communication hurdles during internet downtime.
Evaluating several candidate properties across town often turns into a busy field day where your phone acts as a flashlight, camera, and measurement notebook. Relying on practical battery habits like keeping your phone alive during long outings ensures your primary diagnostic tool stays operational across multiple walkthroughs without needing frequent wall recharges.
Examine ambient wireless congestion by opening your device Wi-Fi menu to observe surrounding wireless networks. In multi-story office buildings, dozens of nearby wireless routers compete for radio frequencies. A crowded wireless environment means your setup will require dual-band hardware and careful channel selection to avoid interference and sluggish local connectivity.
Evaluating Environmental Controls for Network Gear
Routers, switches, and network storage hardware generate constant heat and need cool, clean airflow. Inspect the closet or cabinet where this central hardware will live. A closed utility closet without ventilation will trap heat, reducing hardware lifespan and causing unexpected restarts. Check whether the designated closet has louvered doors or an exhaust fan to pull hot air away from equipment.
Look upward inside any potential server closet to inspect overhead plumbing lines. Water pipes and drainage lines running directly above equipment racks create leak risks that could damage expensive electronics. Additionally, ensure the equipment space has a sturdy door lock to prevent unauthorized access to core network connections.
Creating a Portable Site Inspection Kit
Conducting a thorough technology check requires only a few compact tools. Packing a small diagnostic kit allows you to perform quick, objective assessments without inconveniencing property managers during a viewing.
- A three-prong electrical outlet tester to verify socket wiring and grounding.
- A compact measuring tape to check desk clearances and closet rack space.
- A small flashlight to inspect dark utility closets and ceiling cavities.
- A smartphone for checking cellular reception, scanning Wi-Fi, and taking notes.
Photograph electrical panel labels, utility demarcations, and wall ports in each room. Recording these visual notes immediately helps you compare candidate spaces accurately once you return to your desk.
Turning Inspection Notes Into Informed Decisions
After finishing your tours, organize your notes into a simple comparison list. Identifying required improvements, such as installing additional wall outlets or adding ethernet cabling, gives you tangible items to raise during lease discussions. Commercial landlords are often willing to complete basic infrastructure modifications or provide improvement allowances to secure a reliable tenant.
Investigating technological infrastructure before signing an agreement protects your budget and daily productivity. By examining power distribution, cable routes, cellular strength, and equipment ventilation during your initial walkthrough, you can select a workspace that supports reliable operations from the very first day.